

Set Up a Neo4j Graph Database on a GCP VM
Set Up a Neo4j Graph Database on a GCP VM
Exploring Friendships and Coffee Shops with Neo4j on GCP

Imagine a group of friends, each with their favourite coffee shop. We're going to create a graph in Neo4j that represents each friend, their go-to coffee spots, and the friendships among them.
First, we'll create nodes for each friend and coffee shop.
CREATE (Emma:Person {name: 'Emma', age: 24})
CREATE (Liam:Person {name: 'Liam', age: 26})
CREATE (Olivia:Person {name: 'Olivia', age: 25})

CREATE (JavaJunction:CoffeeShop {name: 'Java Junction'})
CREATE (BeanBrew:CoffeeShop {name: 'Bean Brew'})
CREATE (CaffeineCorner:CoffeeShop {name: 'Caffeine Corner'})
Next, we establish relationships between friends and their favourite coffee shops, and also friendships. In this step, we're using FAVORS relationships to link each person to their favourite coffee shop and FRIENDS_WITH relationships to connect the friends.
For e.g., we create a relationship between ‘Emma’ and ‘Java Junction’. If this relationship already exists, MERGE will not create a duplicate. Then we create a 'FRIENDS_WITH' relationship between Emma and Olivia.
MATCH (e:Person {name: 'Emma'}), (jj:CoffeeShop {name: 'Java Junction'})
MERGE (e)-[:FAVORS]->(jj)
WITH e, jj
MATCH (l:Person {name: 'Liam'}), (bb:CoffeeShop {name: 'Bean Brew'})
MERGE (l)-[:FAVORS]->(bb)
WITH l, bb
MATCH (o:Person {name: 'Olivia'}), (cc:CoffeeShop {name: 'Caffeine Corner'})
MERGE (o)-[:FAVORS]->(cc)
WITH o, cc
MATCH (Emma:Person {name: 'Emma'}), (Olivia:Person {name: 'Olivia'})
MERGE (Emma)-[:FRIENDS_WITH]->(Olivia)
WITH Emma, Olivia
MATCH (Olivia:Person {name: 'Olivia'}), (Liam:Person {name: 'Liam'})
MERGE (Olivia)-[:FRIENDS_WITH]->(Liam)
Let's run a query to find out who likes 'Bean Brew':
MATCH (p:Person)-[:FAVORS]->(cs:CoffeeShop {name: 'Bean Brew'})
RETURN p.name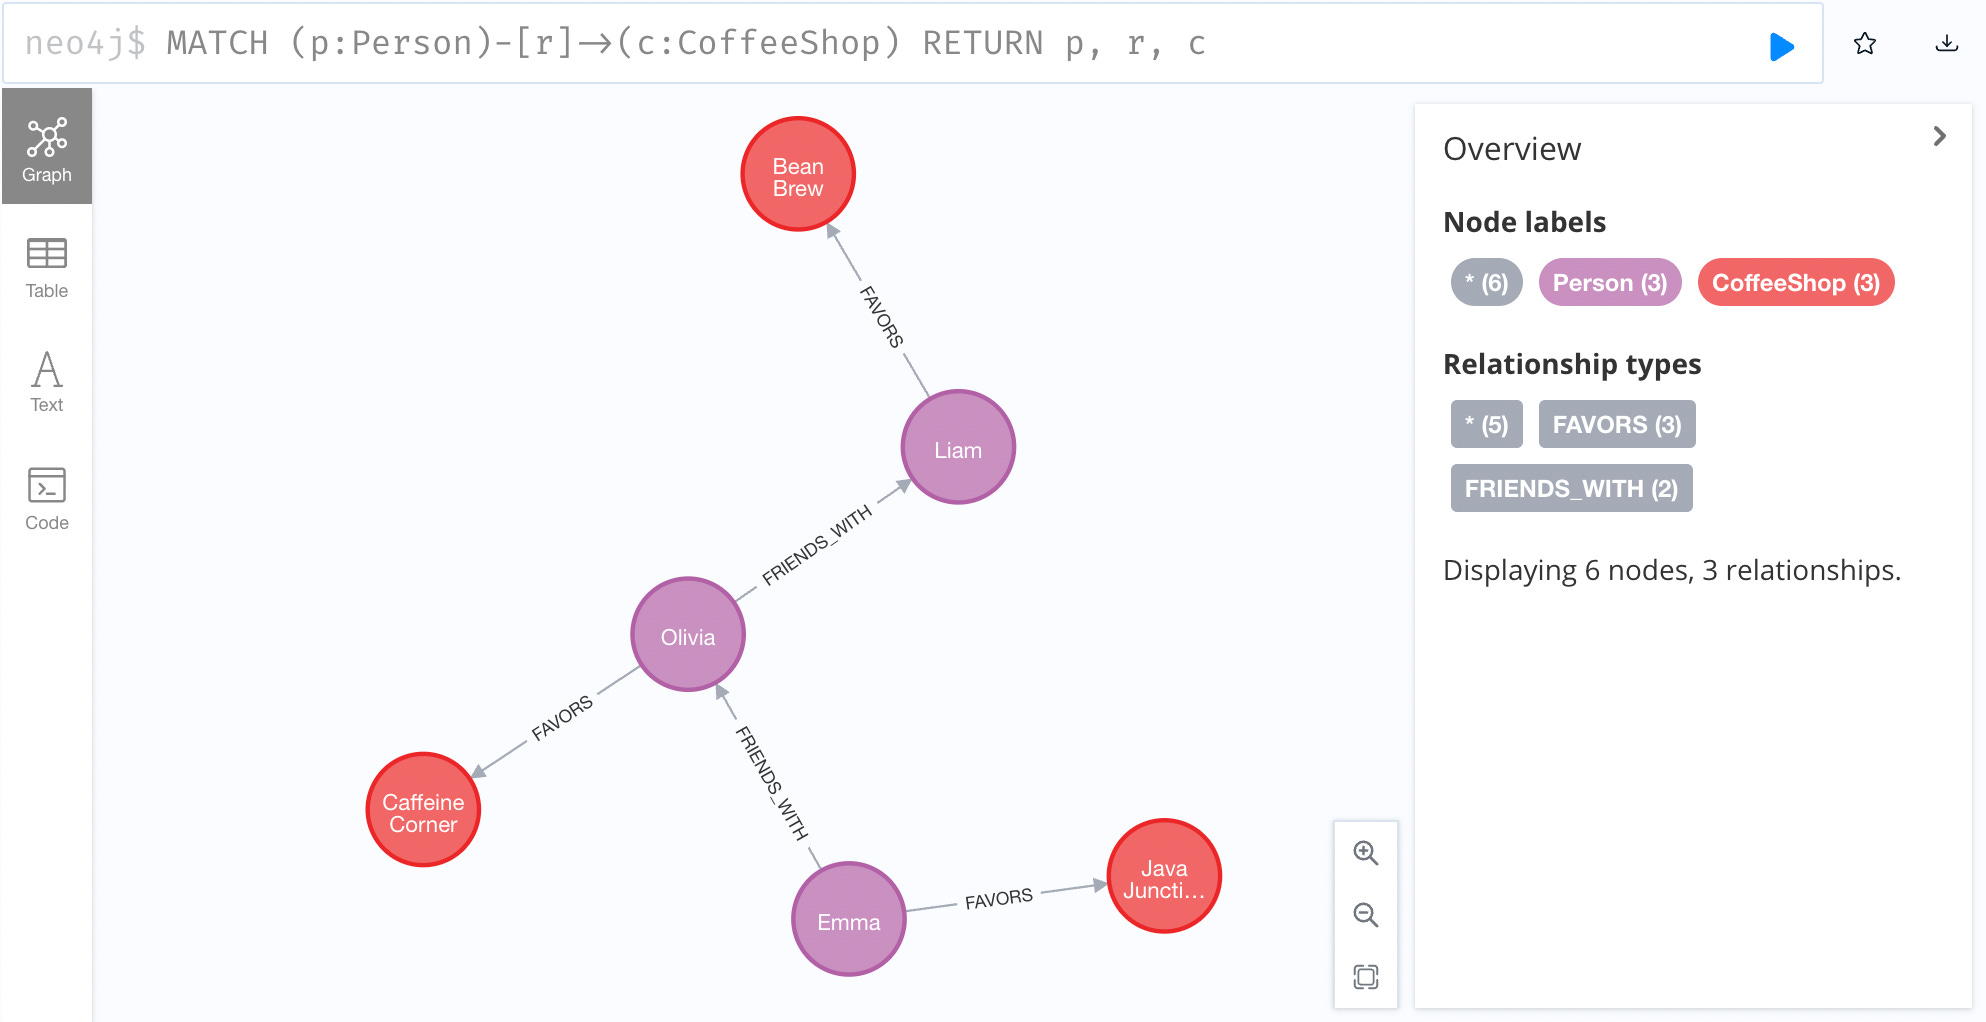
This query will return the name of the person who favors 'Bean Brew', which in our graph is Liam.
So, what exactly is Neo4j?
Now that we've seen Neo4j in action, let's backtrack a bit and talk about what Neo4j really is. It is a graph database management system that is built to deal with complex data relationships way better than your standard relational databases. This blog post will guide you through setting up Neo4j on GCP.
Hosting on GCP:
So why should you choose GCP for hosting Neo4j?
Scalability: GCP lets you easily adjust resources to handle different database loads, ensuring efficient performance even as your data grows.
Security: With GCP's security measures, your data remains protected, which is crucial for sensitive information.
Cost-Effectiveness: GCP's pay-as-you-go pricing model makes it a budget-friendly option, especially for projects with fluctuating resource needs.
Setting up a VM on GCP:
We start by configuring the GCP project and creating a new VM instance using the gcloud command-line tool.
gcloud config set project [ID]

gcloud compute instances create neo4j-vm \
    --machine-type=n1-standard-1 \
    --image-family=debian-10 \
    --image-project=debian-cloud \
    --zone=us-central1-a
Set up firewall rules:
Next, we have to make sure the VM can receive traffic on the ports used by Neo4j. The default is 7474 for HTTP and 7687 for Bolt protocol.
gcloud compute firewall-rules create default-allow-http \
    --allow tcp:7474 \
    --target-tags=http-server \
    --source-ranges=0.0.0.0/0

gcloud compute firewall-rules create default-allow-bolt \
    --allow tcp:7687 \
    --target-tags=bolt-server \
    --source-ranges=0.0.0.0/0
The above command initiates a SSH connection to neo4j-vm.
-L 7474:localhost:7474: This forwards port7474on your local machine to port7474on the virtual machine. This is often used for accessing web applications running on the virtual machine (like Jupyter notebooks) from your local browser.-L 7687:localhost:7687: Similarly, this forwards port7687on your local machine to port7687on the virtual machine. Port7687is commonly used by Neo4j, a graph database, for its Bolt protocol, which is a binary protocol for database access.
Download Neo4j:
Now, download and install Neo4j. We'll use the latest stable version:
wget -O - https://debian.neo4j.com/neotechnology.gpg.key | sudo apt-key add -

echo 'deb https://debian.neo4j.com stable 4.4' | sudo tee -a /etc/apt/sources.list.d/neo4j.list

sudo apt-get update

sudo apt-get install neo4j=1:4.4.12
Start the Neo4j service:
cd /var/lib/neo4j
./bin/neo4j start
Accessing Neo4j on the VM:
Once you have Neo4j installed and running on your VM, the next step is to securely access it. To connect to your VM and forward the necessary ports for Neo4j, use the following command:
gcloud compute ssh --zone "us-west1-b" "neo4j-vm" --project "ID" -- -L 7474:localhost:7474 -L 7687:localhost:7687After running the above command, your local machine is connected to the VM, and the ports for accessing Neo4j are forwarded. You can access the Neo4j browser interface at http://localhost:7474. By default, your username is neo4j. You can set an initial password using this command:
/bin/neo4j-admin set-initial-password 1234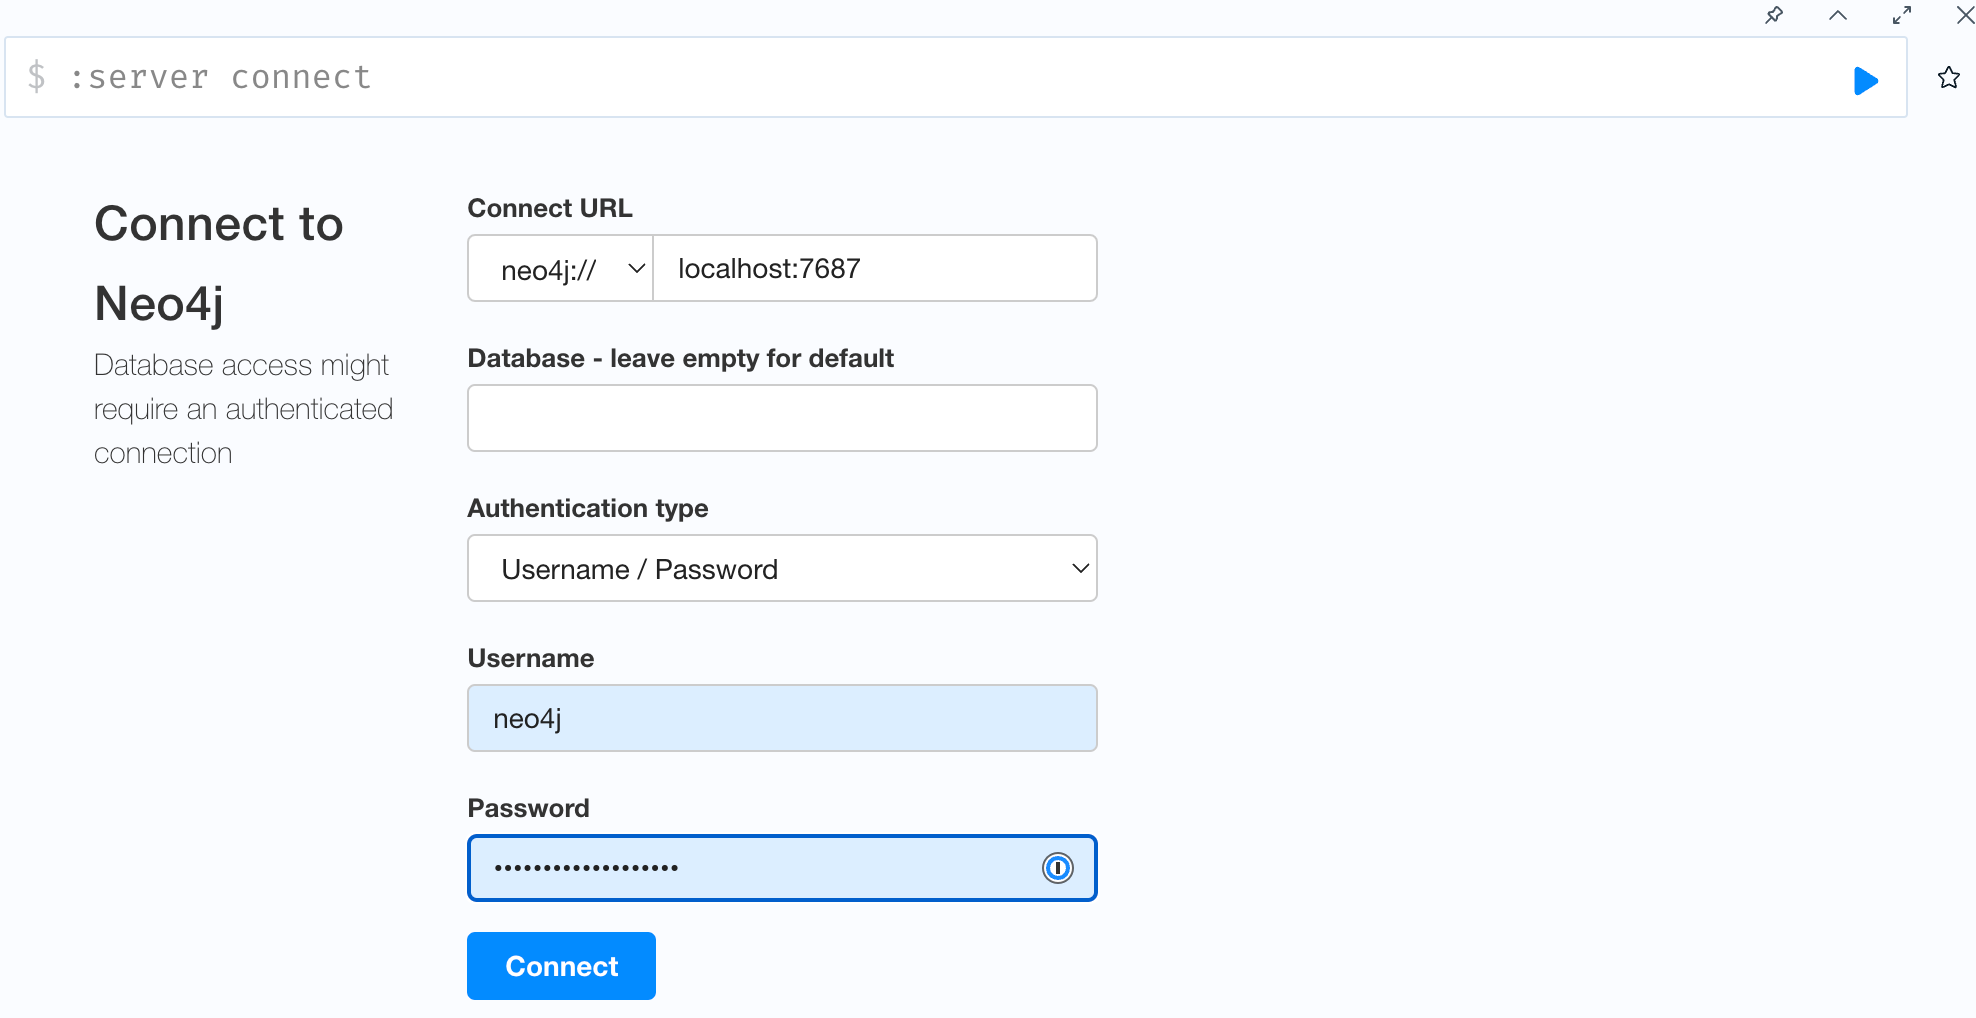
Follow the instructions to reset your password. Once you have done so, your window should look something like this:
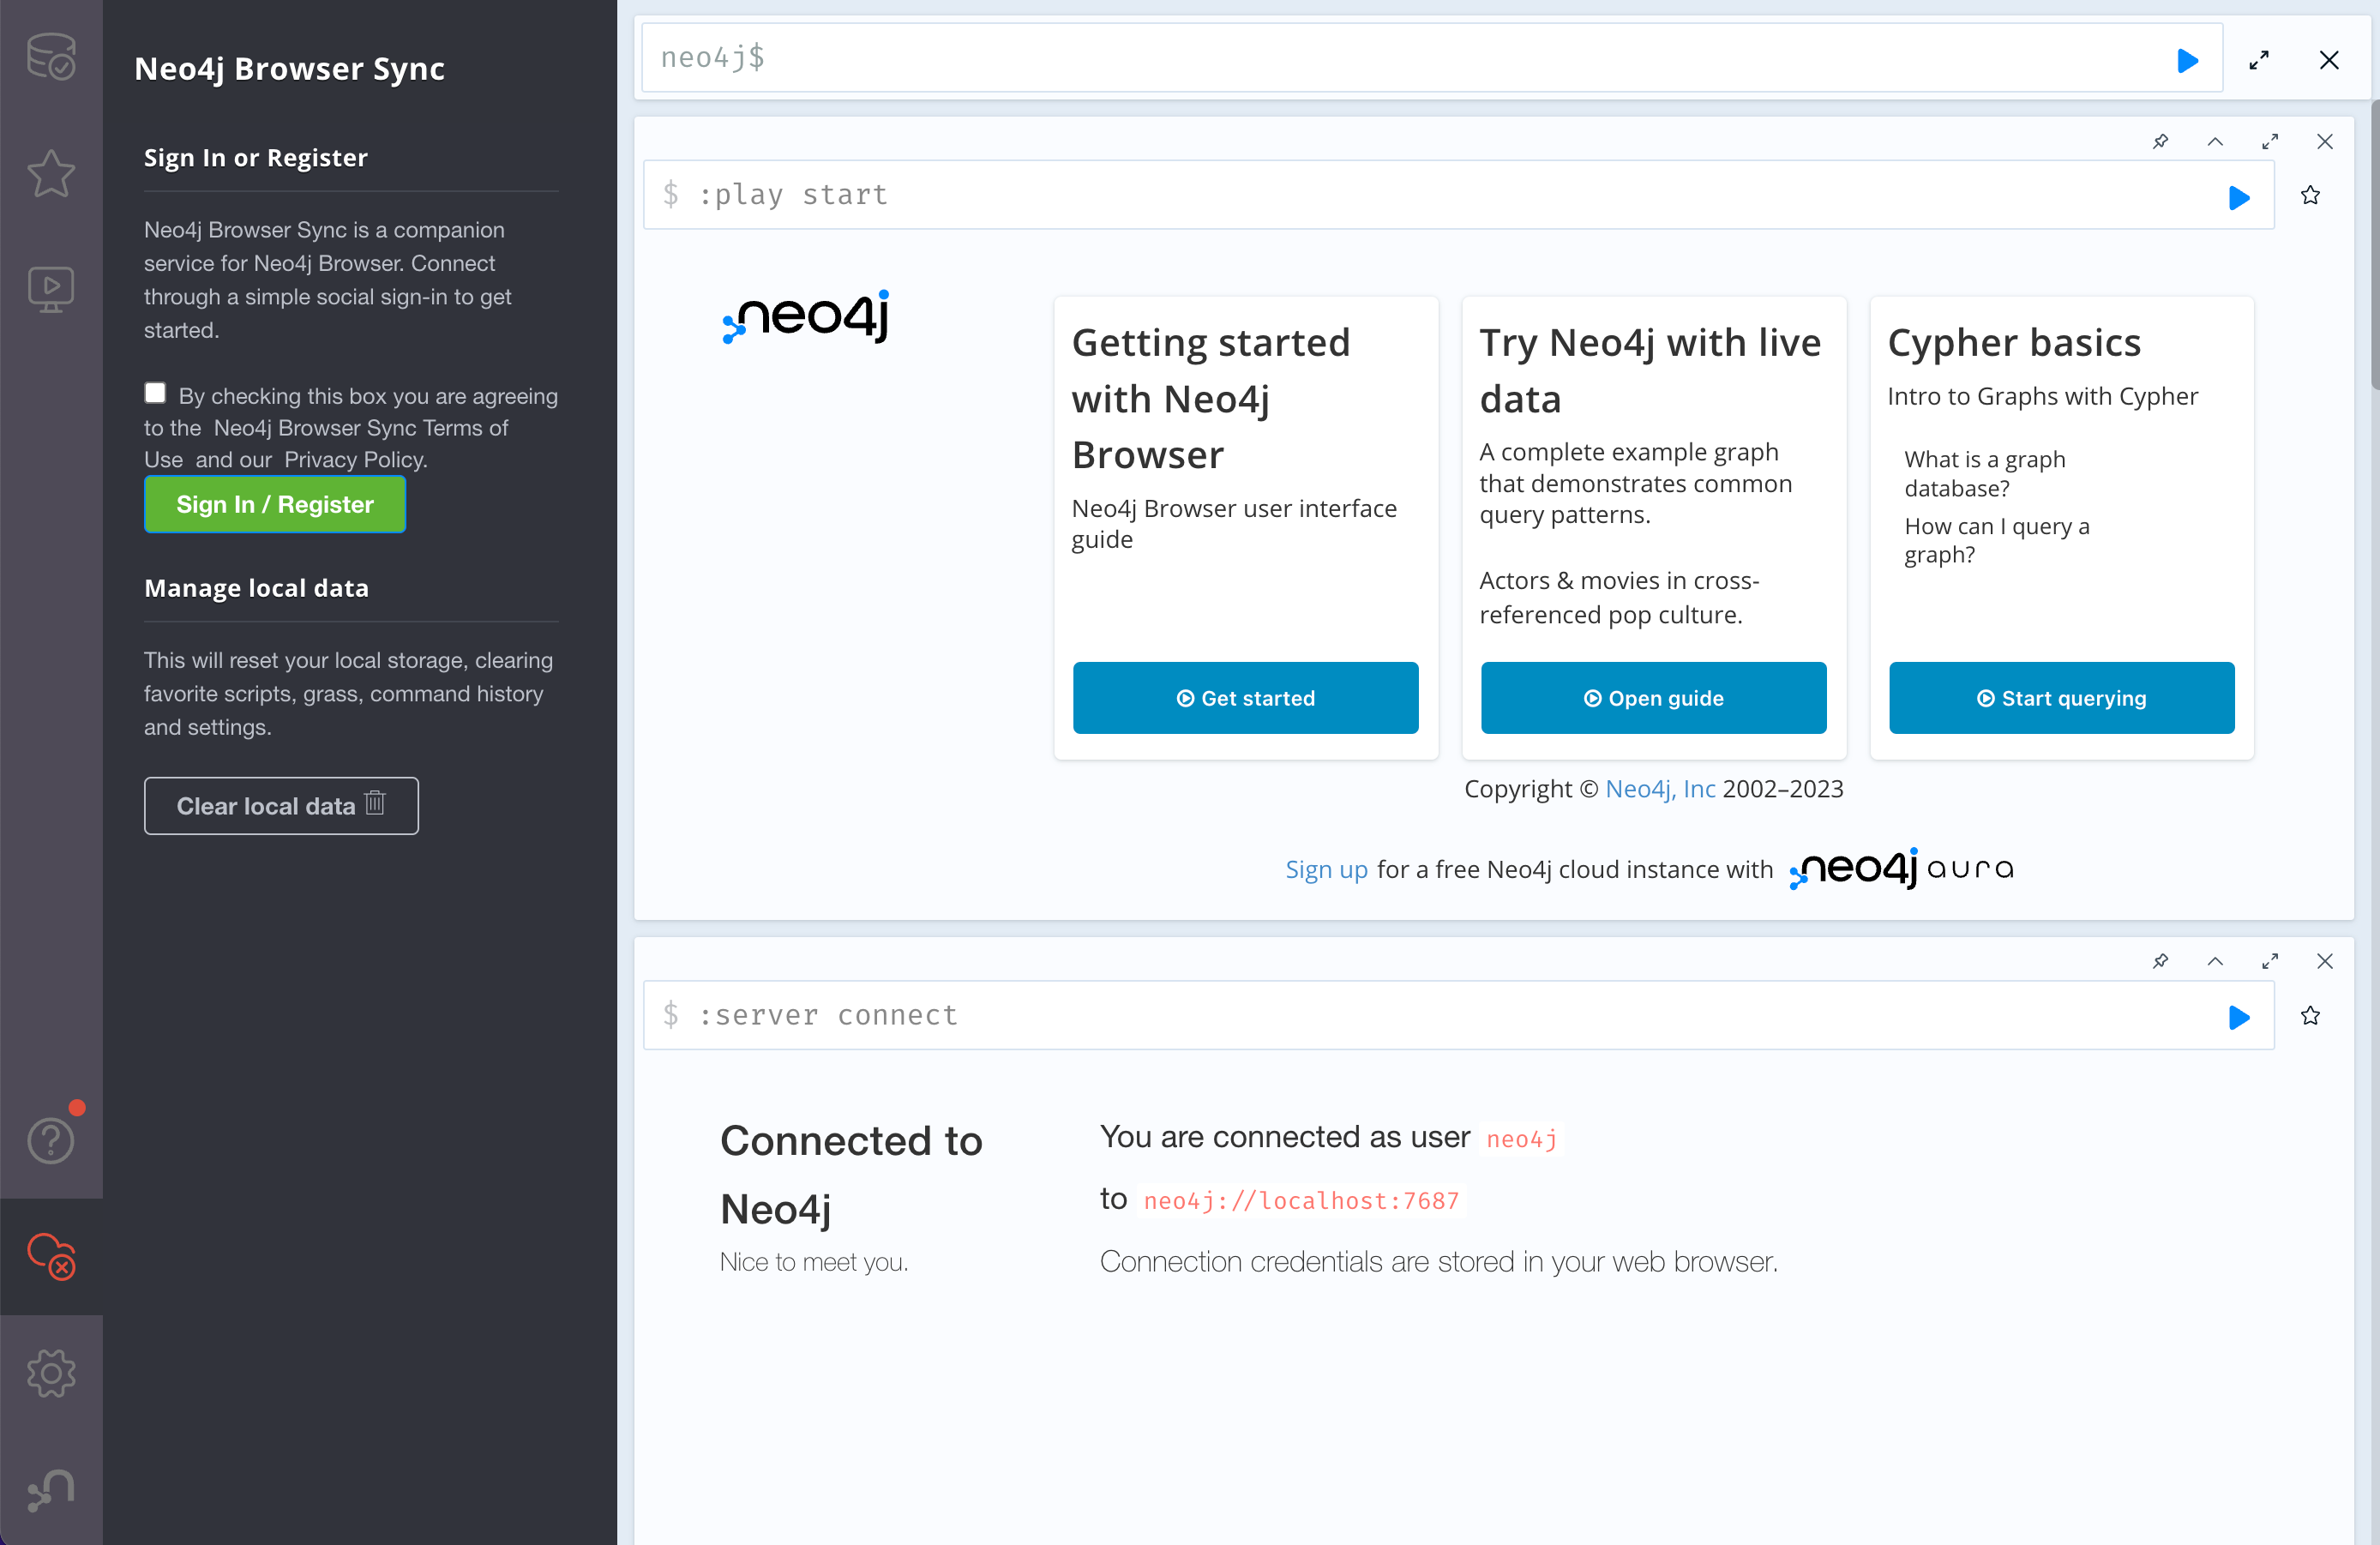
You now have a fully functional Neo4j graph database running on a GCP VM!