

Create your own CRYPTOCURRENCY on Polygon zkEVM - NO CODING
Create your own CRYPTOCURRENCY on Polygon zkEVM - NO CODING
Join me and explore the possibilities of the newly launched Polygon zkEVM and be able to get started on building on top of it without any coding or development experience.

I’m new to this and idk what Polygon zkEVM is?
To get started in understanding what Polygon zkEVM is and the benefits that it brings to Web3 developers and users, we have to understand first how “zero knowledge proof” works and how it is currently used in Web3. In which I have explained in the simplest possible explanation that I can on Twitter. (Check here)
zkEVM stands for “Zero knowledge Ethereum Virtual Machine” and it uses zero knowledge proofs to enable a number of benefits to its users such as cheaper transaction fees, faster transaction speed and same level of security inherited from Ethereum Mainnet. Which are very beneficial to users as well as to developers and builders as this would mean that they could already use blockchain in a wide variety of use cases such as on games, payment / financial solutions and platforms that are transaction / activity heavy. (Click here if you want to learn more about Polygon zkEVM and its technical aspects)

How do I get started with Polygon zkEVM?
This could possibly be your first interaction with Polygon zkEVM and if that is the case you’re in the right place as the aim of this tutorial is to provide a starting point for anyone who want to get started without the need of any coding or programming experience. Made possible by the tools and platforms that we will be using on this tutorial!
This tutorial will guide you through deploying your own cryptocurrency in a form of ERC20 token in Polygon zkEVM using Remix IDE and Thirdweb dashboard as two ways of deployment. This tutorial would also guide you on using different Web3 development tools and help you have a grasp on the basics and fundamental concepts of web3 and blockchain development. Now are you ready?
Getting ready for deployment 🧰
Before we could go straight on deploying our ERC20 token on Polygon zkEVM, we would need to make sure of the following first:
Make sure that you have an EVM compatible wallet, For this tutorial I highly suggest that you install Metamask wallet.
Official link: https://metamask.io/


Import Goerli and Polygon zkEVM testnet on your Metamask wallet - We will be using test networks for this tutorial. (You could add both of these networks on chainlist.org)


You would need to acquire a bit of Goerli ETH, You could do that by going to a Goerli testnet faucet. (Just like this one https://goerlifaucet.com/ or feel free to DM me on Twitter and I’ll see if I still have some)

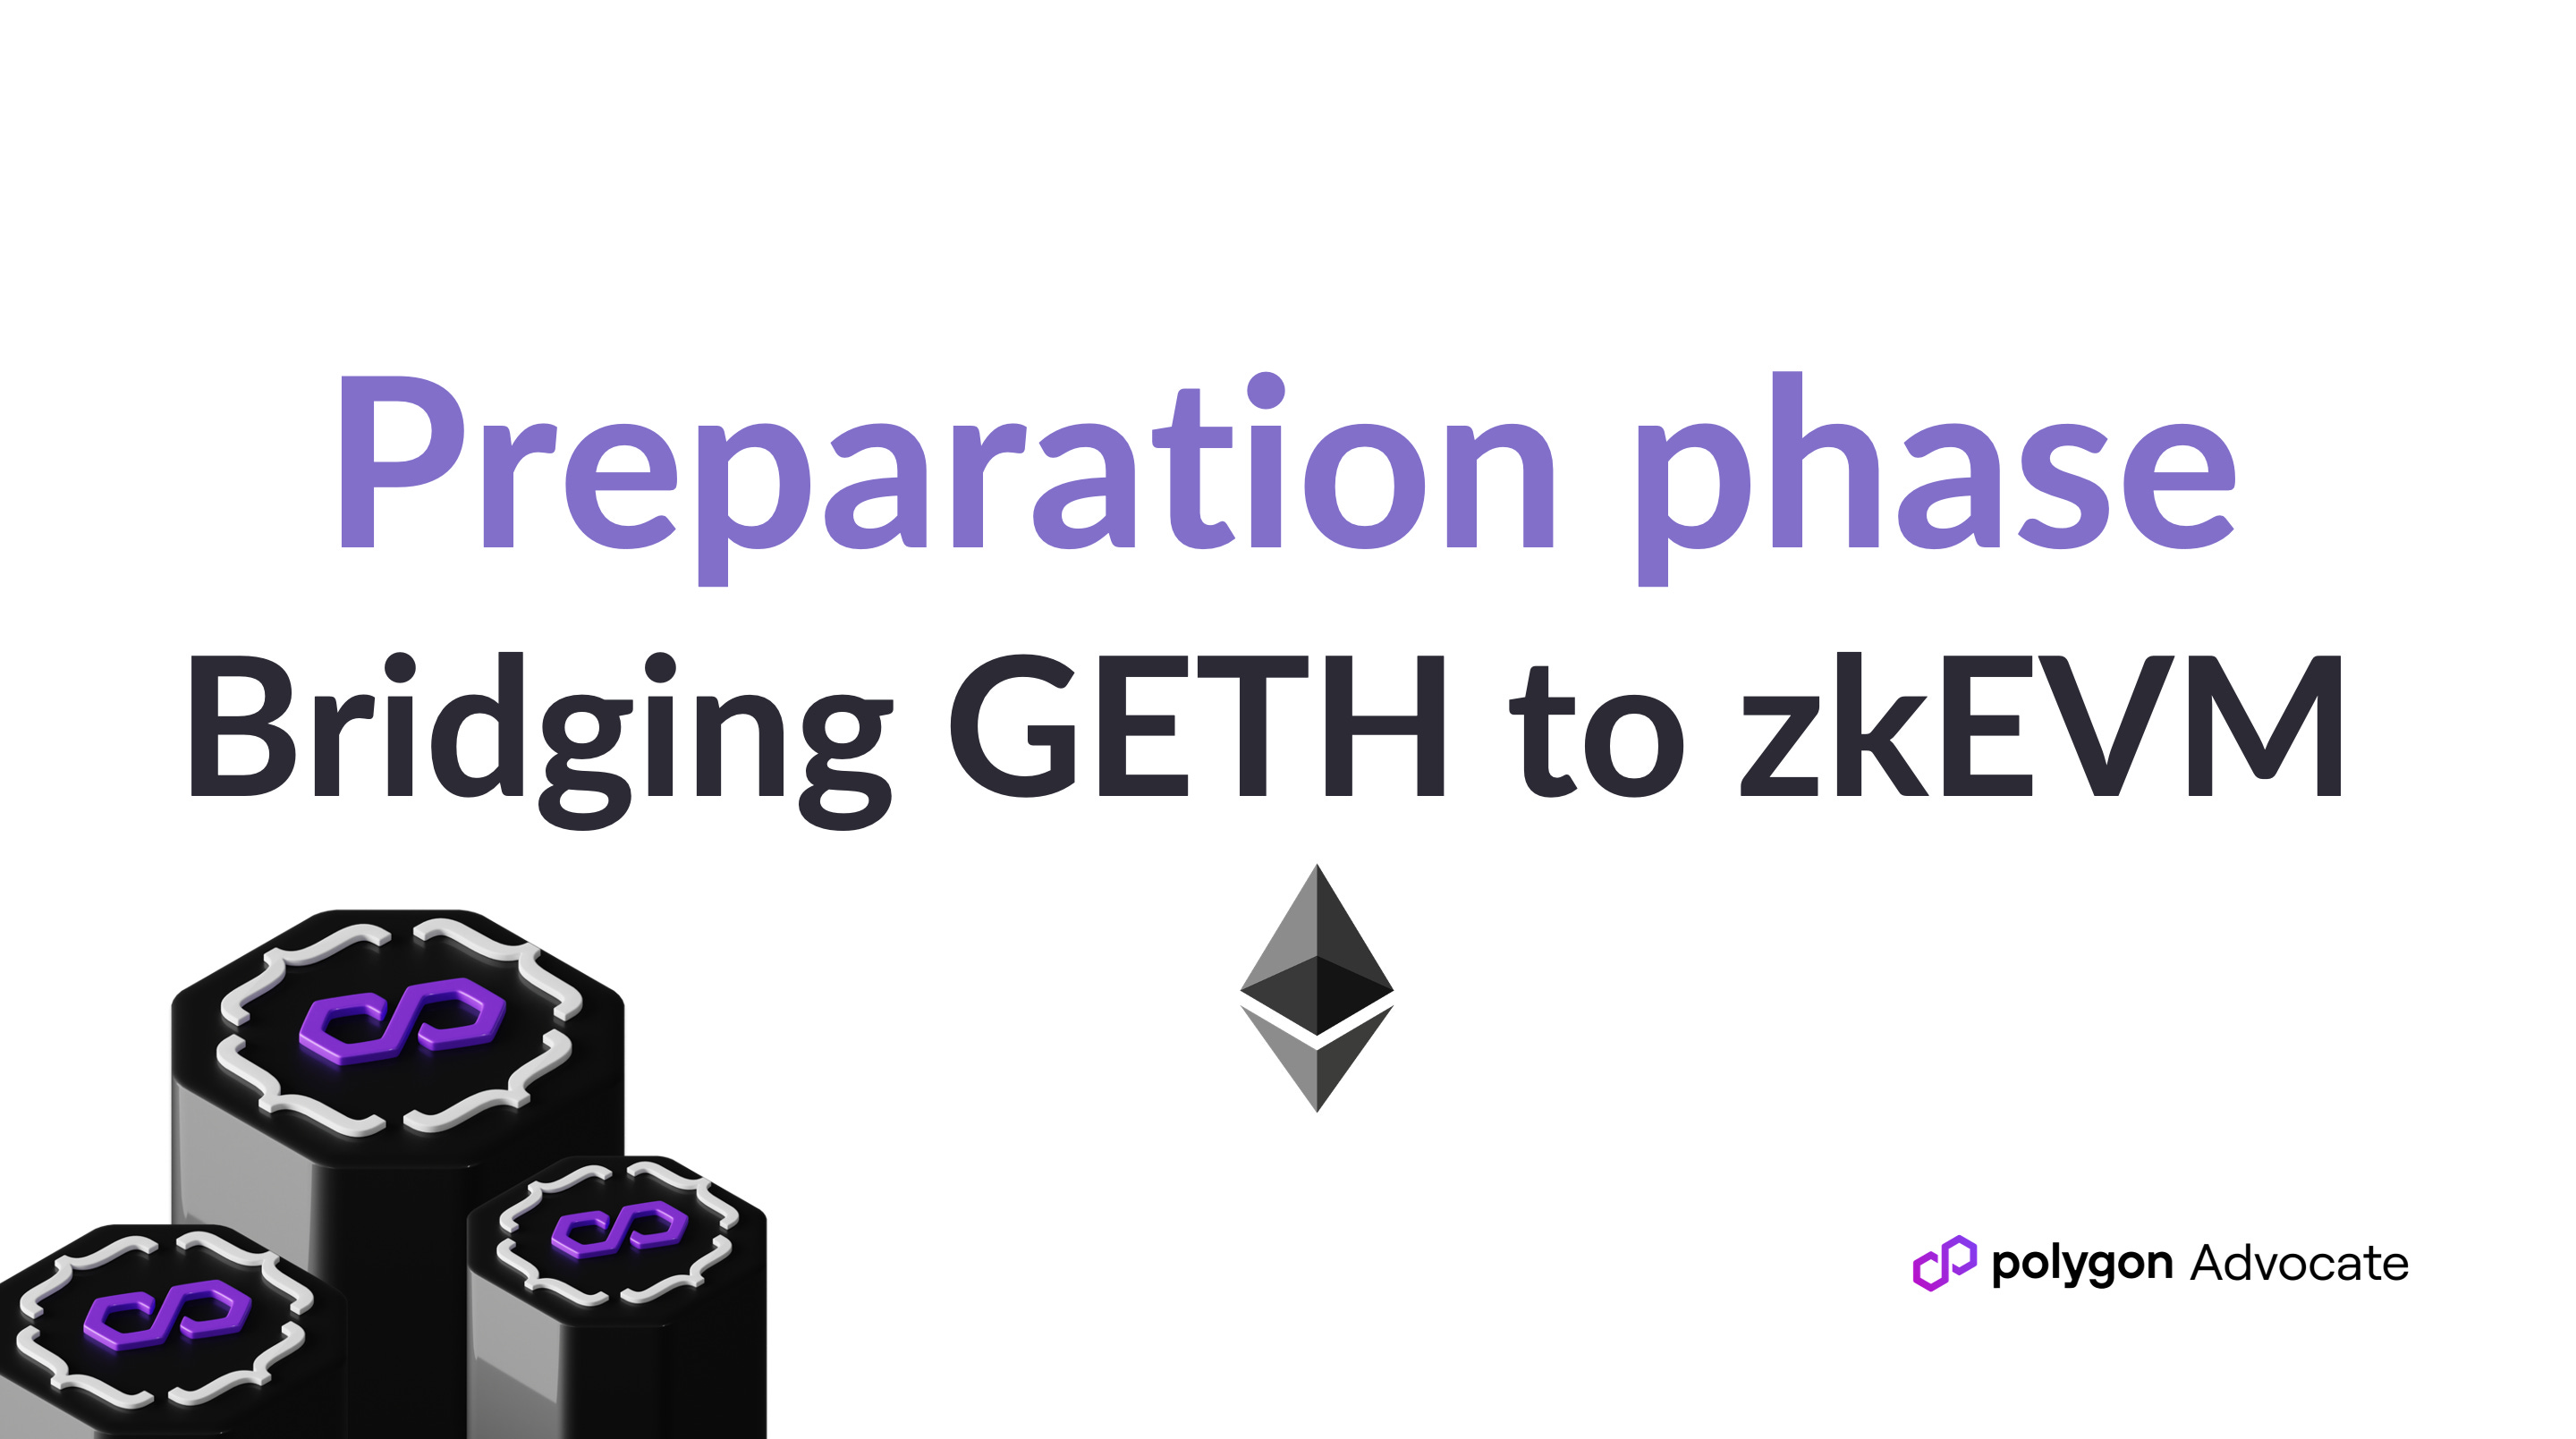
After acquiring GETH, Head to Polygon Wallet Suite for you to bridge GETH to zkEVM testnet. You could do that by going to “Bridge” and swapping it on the dashboard. (Make sure that you tick the “Testnet Products”)


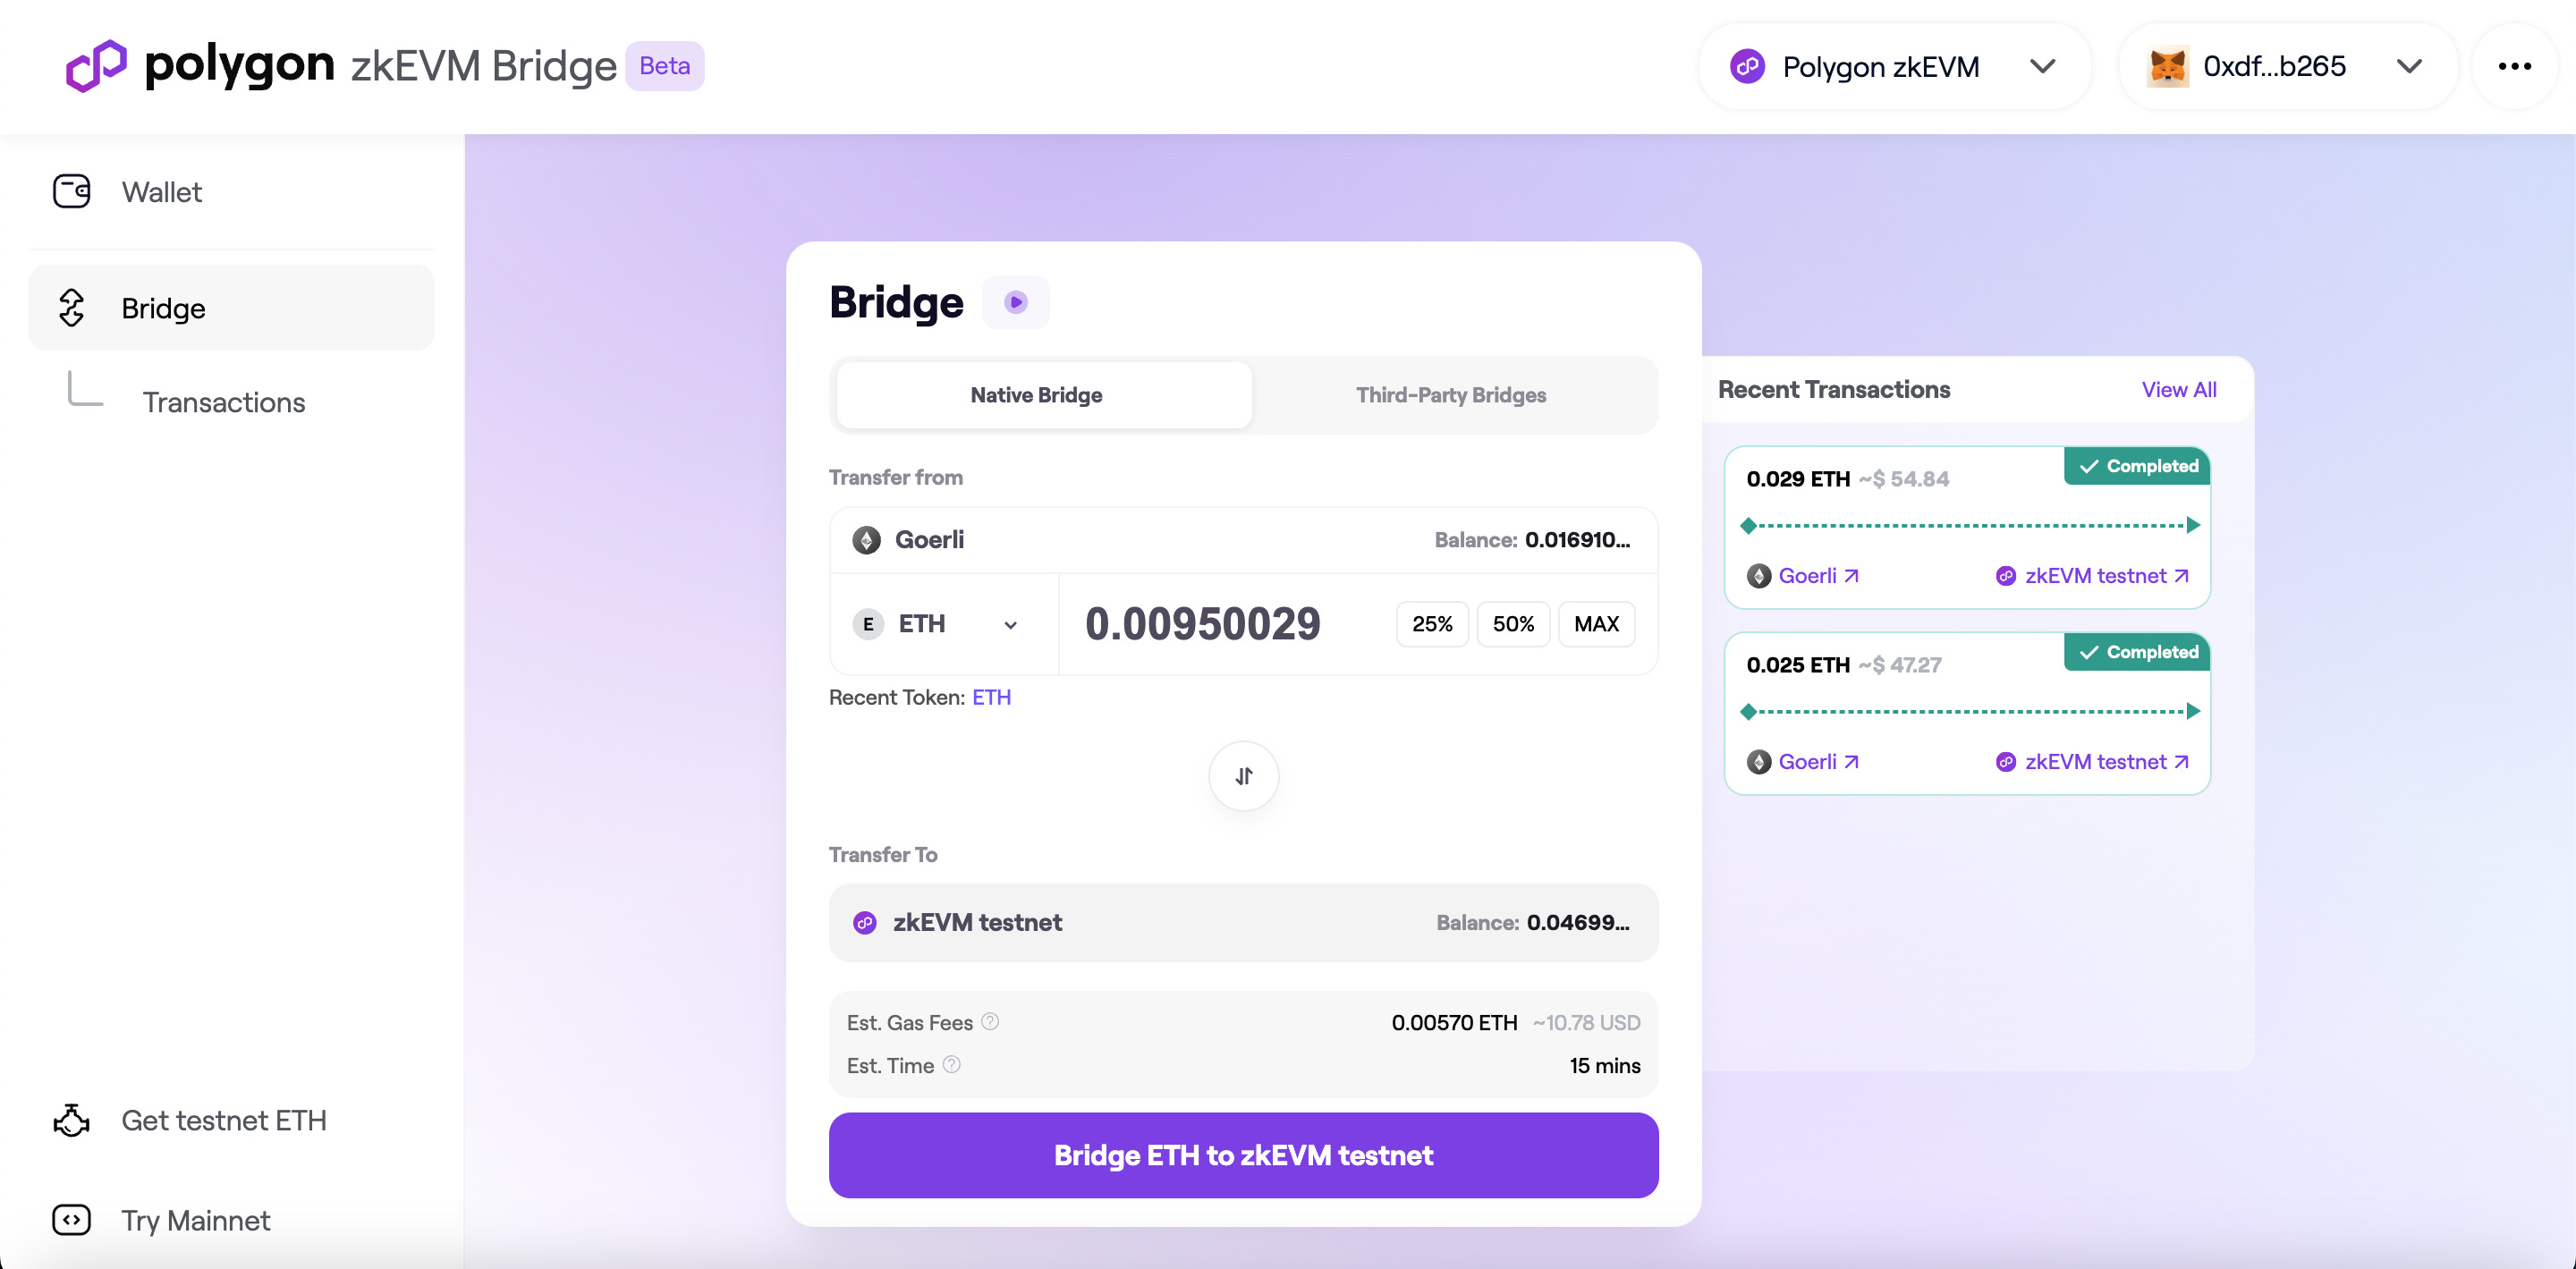
(It might take a while as it is still on a Ethereum testnet, wait for the ETH to arrive on your zkEVM testnet balance before moving on to deployment)
Then that’s it you are now ready to BUIDL on Polygon zkEVM! Let’s now move on to the first way of deployment!🥳🎉
First way: Deploy using Remix IDE 🏗️

Open Remix IDE on your browser (This is the common code editor and IDE that developers use when starting with Solidity, this is where we could write and deploy our smart contracts on the blockchain)

Create a new Solidity file under the contracts folder (to keep it organized)

Head to Openzeppelin Contracts Wizard to generate our ERC20 token smart contract with few features and settings that you could configure and play around. (For this tutorial we will only be adding both Mintable and Burnable features)

Copy your smart contract code and paste it on your blank solidity file on Remix IDE. After that head to “Solidity Compiler” and click the BIG BLUE COMPILE BUTTON to compile our smart contract - Pasted code alert pop up might show just click “Ok”.

(Compiling means creating an ABI and Bytecode output of our code)
After compiling, Go to “Deploy and Run Transactions” and make sure to change your environment to “Injected Provider - Metamask”. (Make sure that your Metamask wallet is set to Polygon zkEVM testnet)

Go ahead and click the orange “Deploy” button and sign the transaction that will show on your screen. (It will only take a few SECONDS) - Make sure you have enough ETH for gas fees


Feel free to double check your deployed contract on the Polygon zkEVM testnet explorer

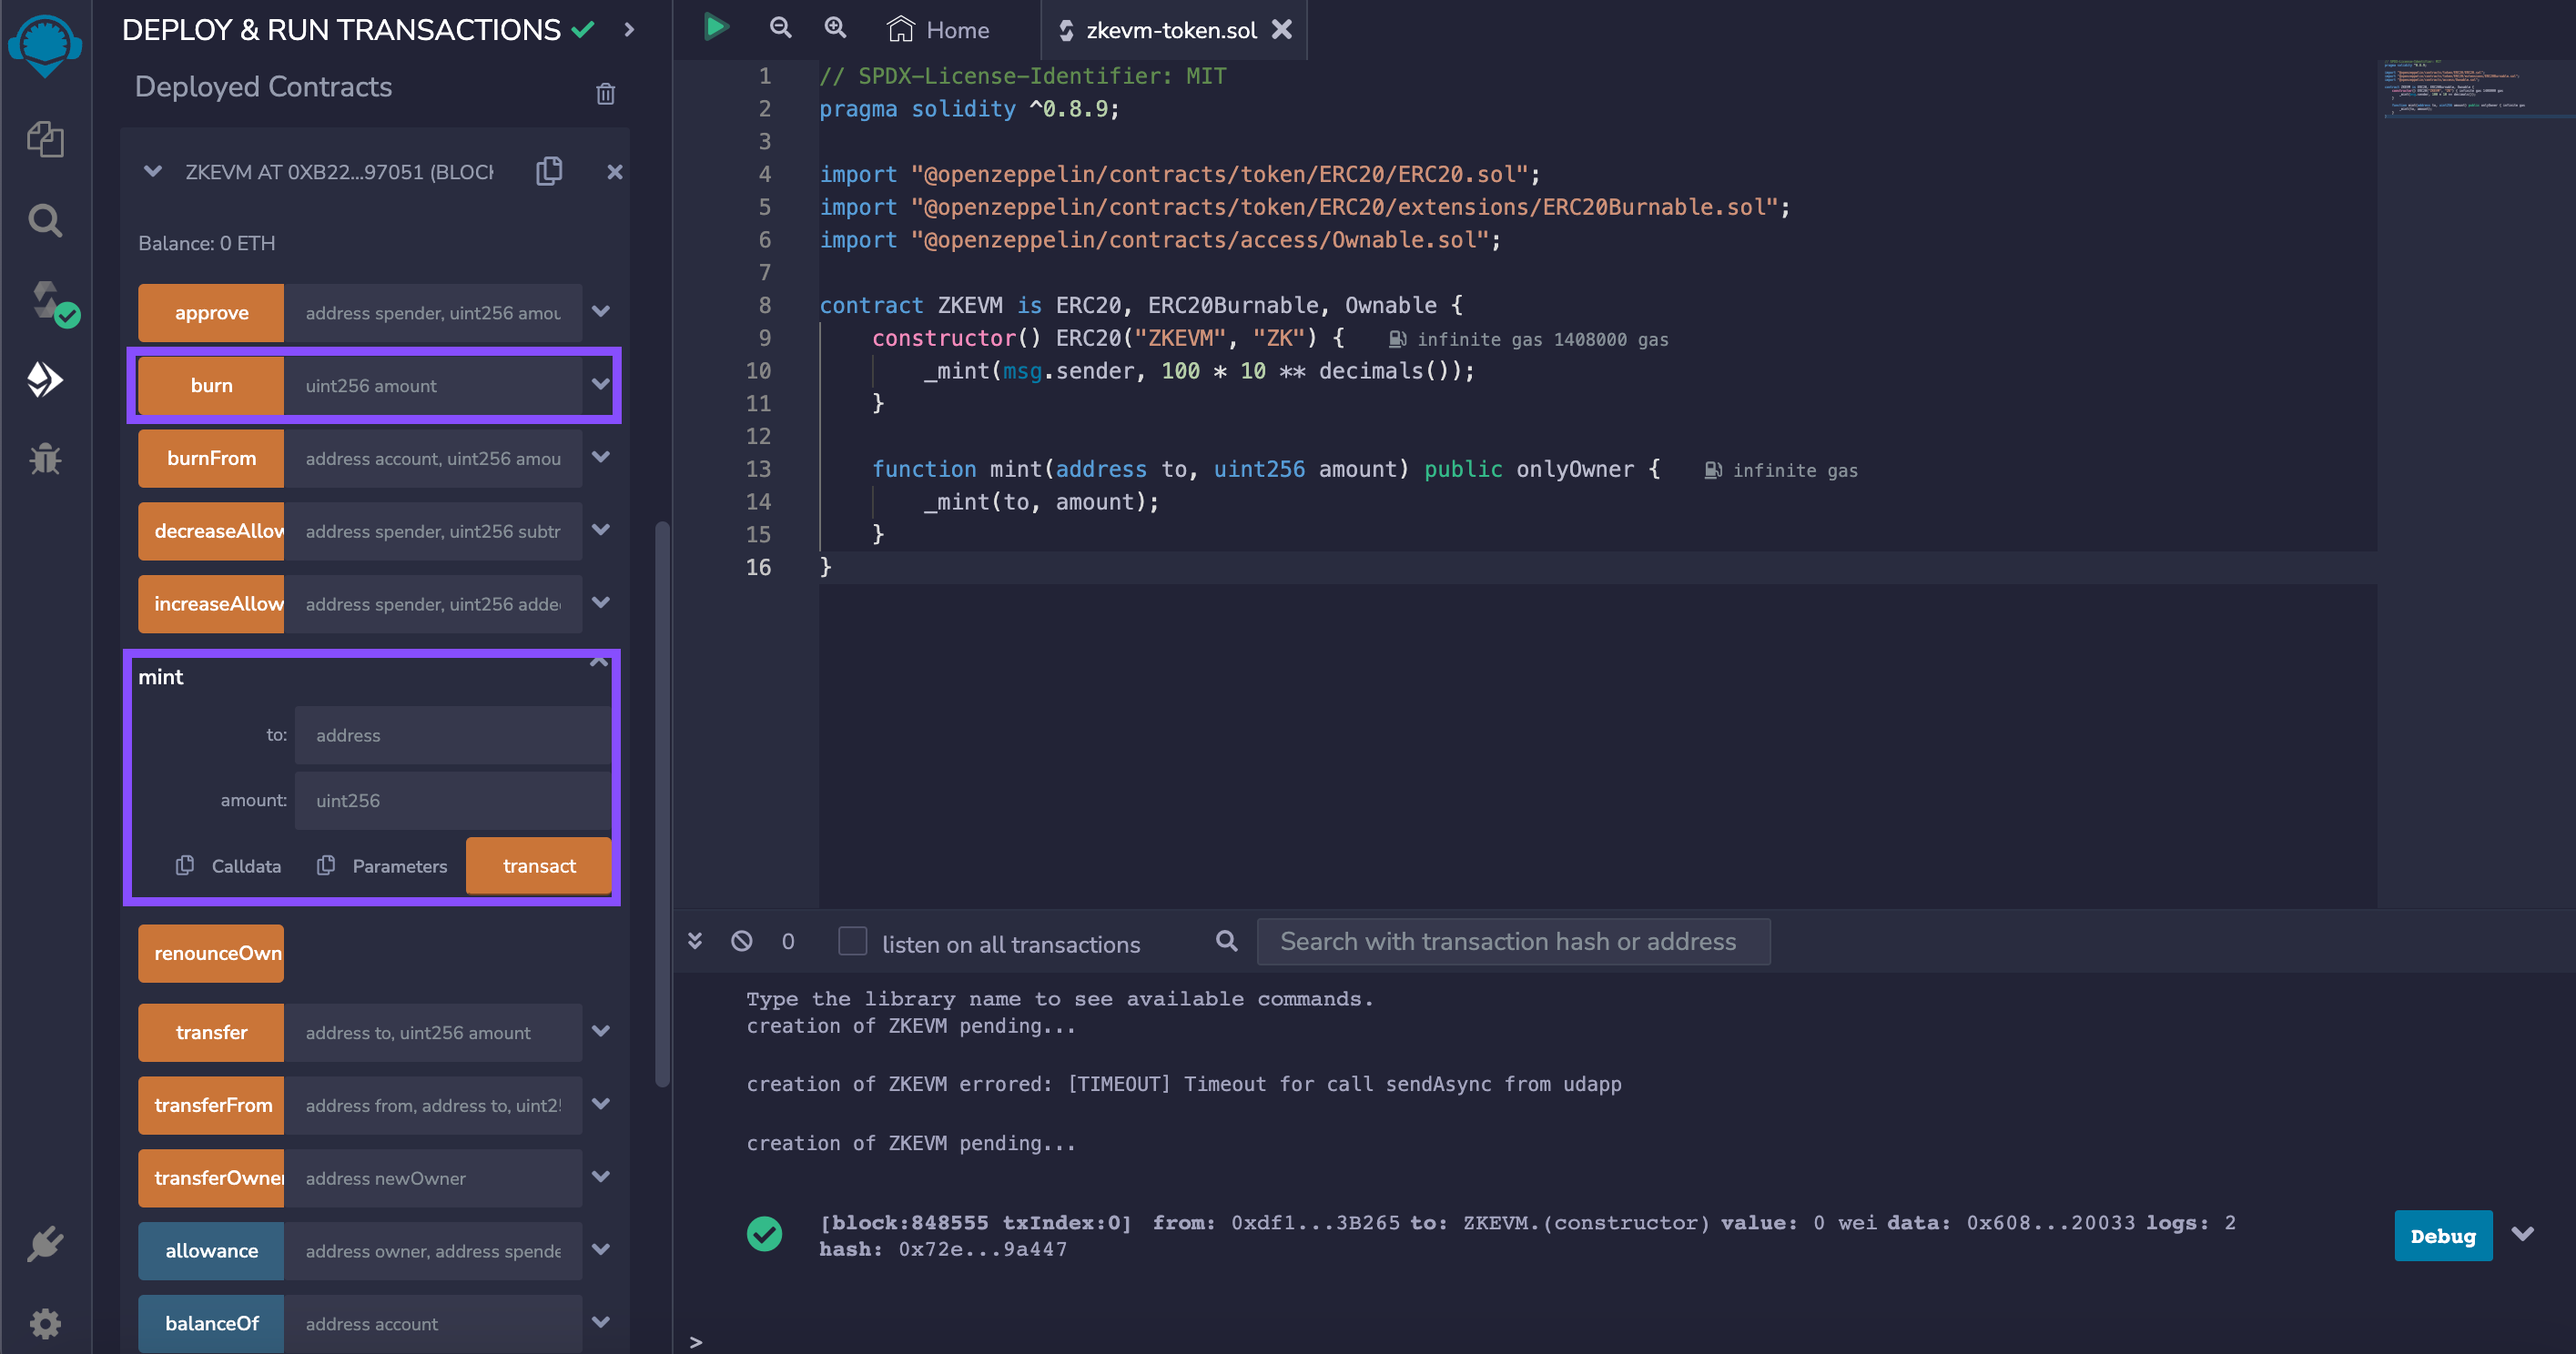
After successfully deploying you may also play and interact with your deployed contract on the “Deployed Contracts” section of Remix IDE. (Try using the Mint and Burn features)

(Take note that the measurement is on WEI, Click here for you to Mint or Burn the specific amount of token you want)


That’s it we are able to create and deploy our own ERC20 token on Polygon zkEVM using Remix IDE and Openzeppelin Contracts Wizard 🥳🎉
The second way that we will showcase on this tutorial is perfect for anyone who don’t want to see any lines of code. (A totally no code way)
Second way: Deploy using Thirdweb Dashboard 🏗️

Go to Thirdweb Explore in which you could see the pre-built and audited smart contracts that they have. (Thirdweb is web3 development tool that offers both with code and no code deployments in the blockchain)


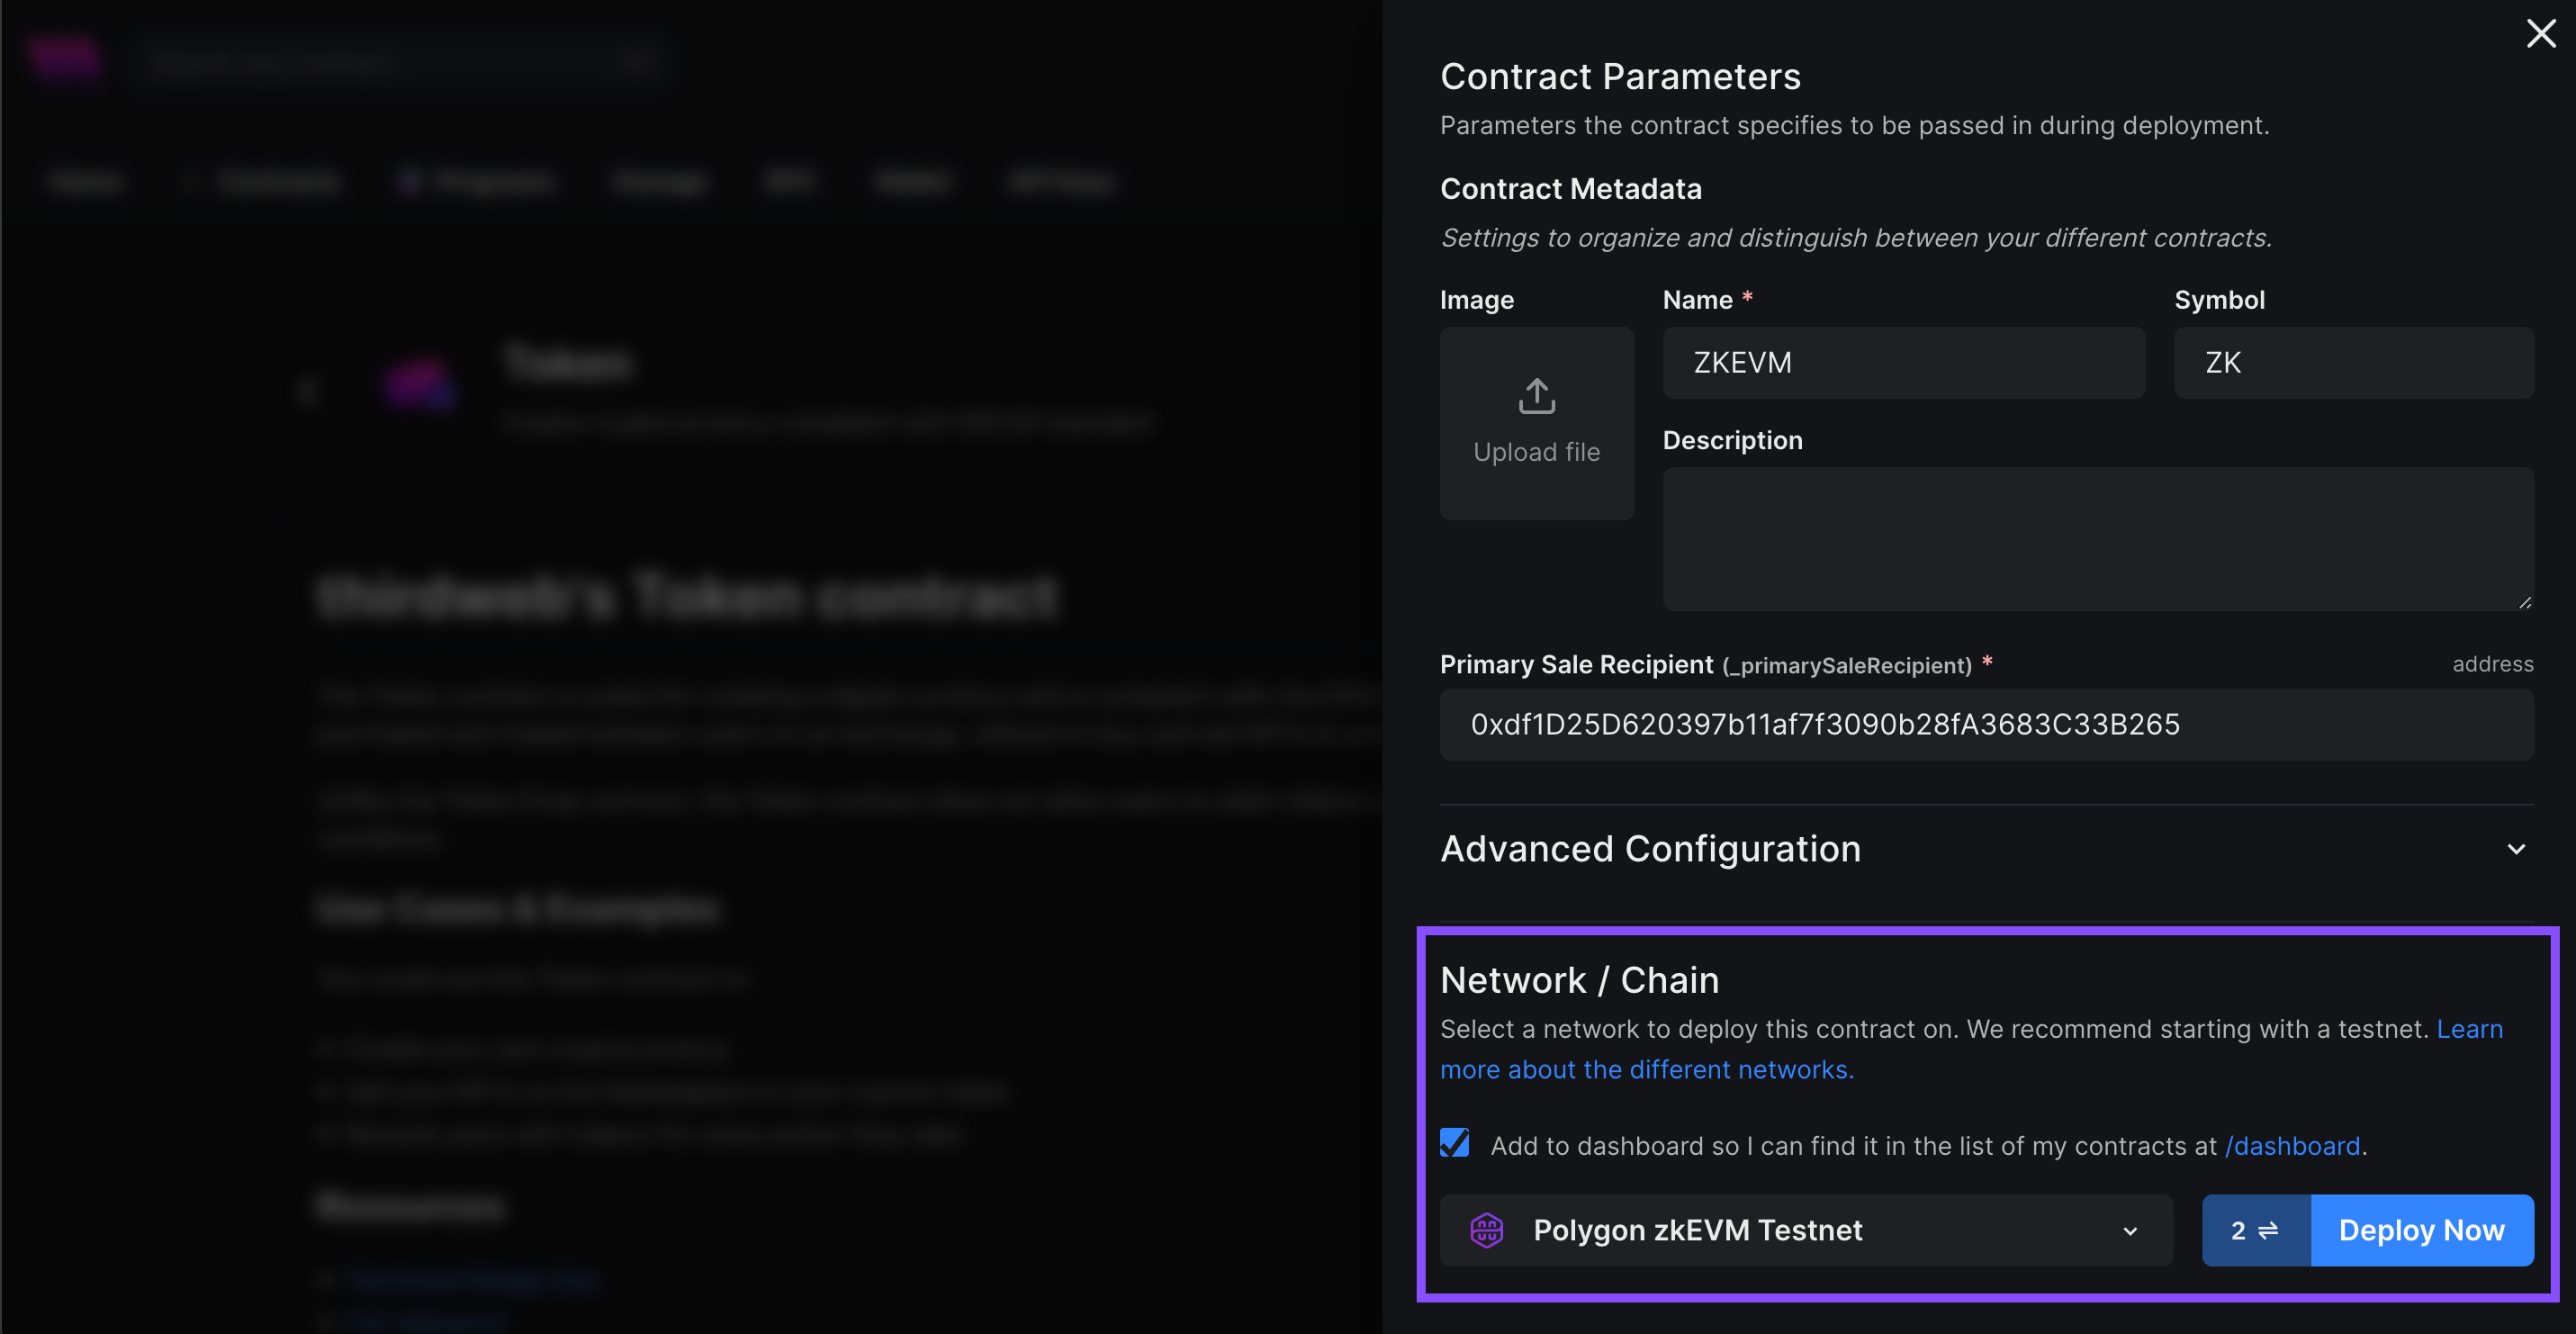
Look for the “Token” contract and click on the “Deploy now" button.

Fill out the required fields for deployment (Feel free to play around with other settings and configuration such as adding an icon for your token and more)

Make sure that you switch the network/chain of deployment to “Polygon zkEVM Testnet”.

Go ahead and “Deploy” and sign the transaction that will show on your screen. After that you should already see your dashboard in which you could use to further interact and configure your ERC20 token.


That would be it for our second way of deployment using the Thirdweb dashboard🥳🎉
Feel free to use the way that works for you and best suits whatever it is you’re building.
What’s the use of knowing how to deploy an ERC20 token on Polygon zkEVM?

ERC20 is the common token standard that is used to create cryptocurrencies and tokens in which you could use as currencies on your game, applications and platforms in Web3. This knowledge would be helpful if you would be working on a project that is looking to deploy on Polygon zkEVM in order to take advantage its solutions.
And since Polygon zkEVM is EVM Equivalent knowing how to deploy here would also mean knowing how to deploy smart contracts on Ethereum and other EVM compatible networks as well + You could impress your frens for knowing what zk is and working with a blockchain that uses it.
Don’t worry we will be doing more advanced stuff soon such as Fullstack DApps, games and sample applications and platforms that will take advantage of the solution that Polygon zkEVM provides.
For a step-by-step tutorial on creating and deploying your own cryptocurrency (ERC20) on Polygon zkEVM - Everything on this written tutorial are also included on this video! 👷🧰
Hey frens! Zab here, and I'm a Community Builder and a Developer advocate in Web3. I have worked with numerous Web3 start-ups, projects, and notable gaming publishing companies here in Southeast Asia, such as Netease and Garena. My mission is to be able to onboard more builders in the space and bridge the gap in education by introducing technical and complex Web3 concepts to beginners and students.
Feel free to learn more about me and the things I have worked on through my personal decentralized website and social media channels using the link below. You could also reach out to me if you need any help, assistance, advice, or questions related to Web3, NFTs, cryptocurrencies, blockchain, or other decentralized and related technologies.
Website: https://zabdiel.eth.limo
Social Media channels: https://beacons.ai/beauzabdiel